Wie du screen.coach wirst
In 5 einfachen Schritten vom Experten zum screen.coach. Folge unserer Anleitung und verdiene noch heute dein erstes Geld.
Die 5 Schritte, um screen.coach zu werden:
1. Registrieren
Kostenloses Konto erstellen und E-Mail bestätigen
2. Profil ausfüllen
Expertise und Erfahrung ins Nutzerprofil eintragen
3. Auszahlungskonto einrichten
Stripe-Onboarding für Zahlungsabwicklung abschließen
4. Angebote erstellen
Verfügbarkeit definieren und Beratungsangebote erstellen
5. Termine durchführen
Live-Sessions durchführen und Geld verdienen
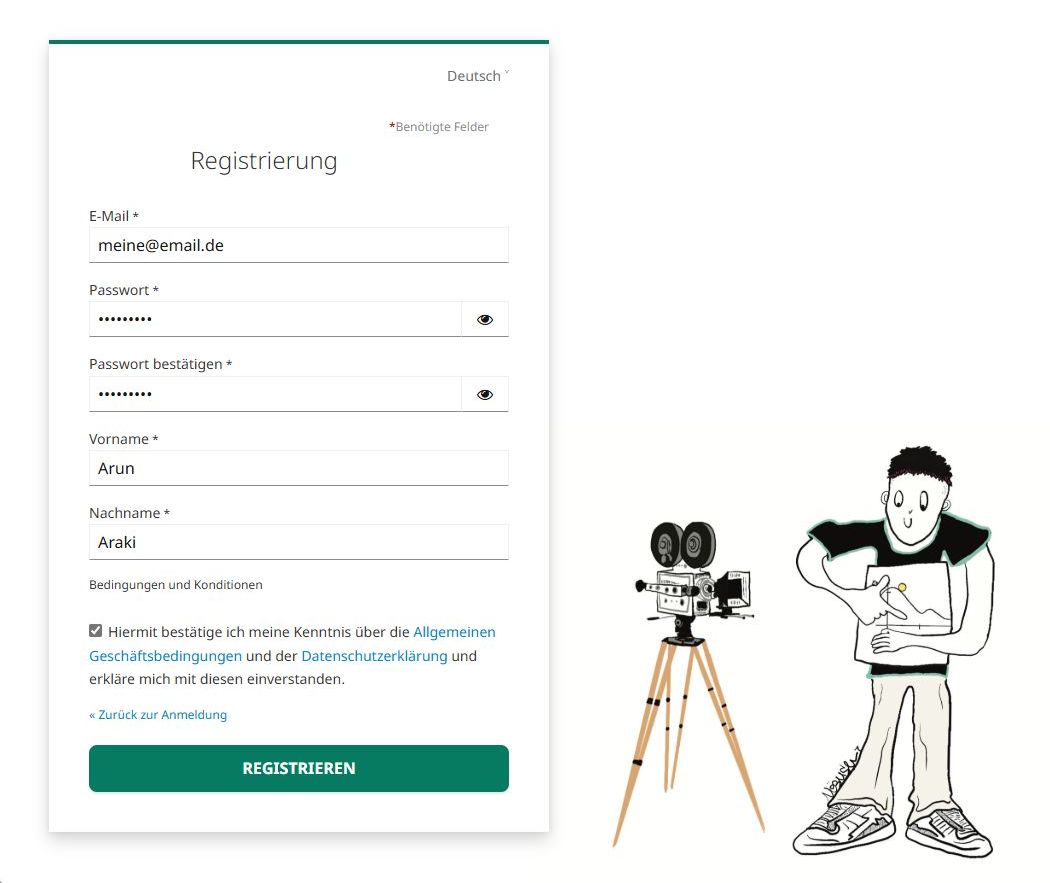
Schritt 1: Registrieren
Erstelle in wenigen Sekunden dein kostenloses screen.coach-Konto. Keine Vorabkosten, keine versteckten Gebühren.
✅ Kostenlos registrieren
✅ E-Mail bestätigen
✅ Du kannst loslegen
Schritt 2: Profil ausfüllen
Erzähle der Welt von deiner Expertise. Ein aussagekräftiges Profil erhöht deine Buchungsrate um das 3-fache.
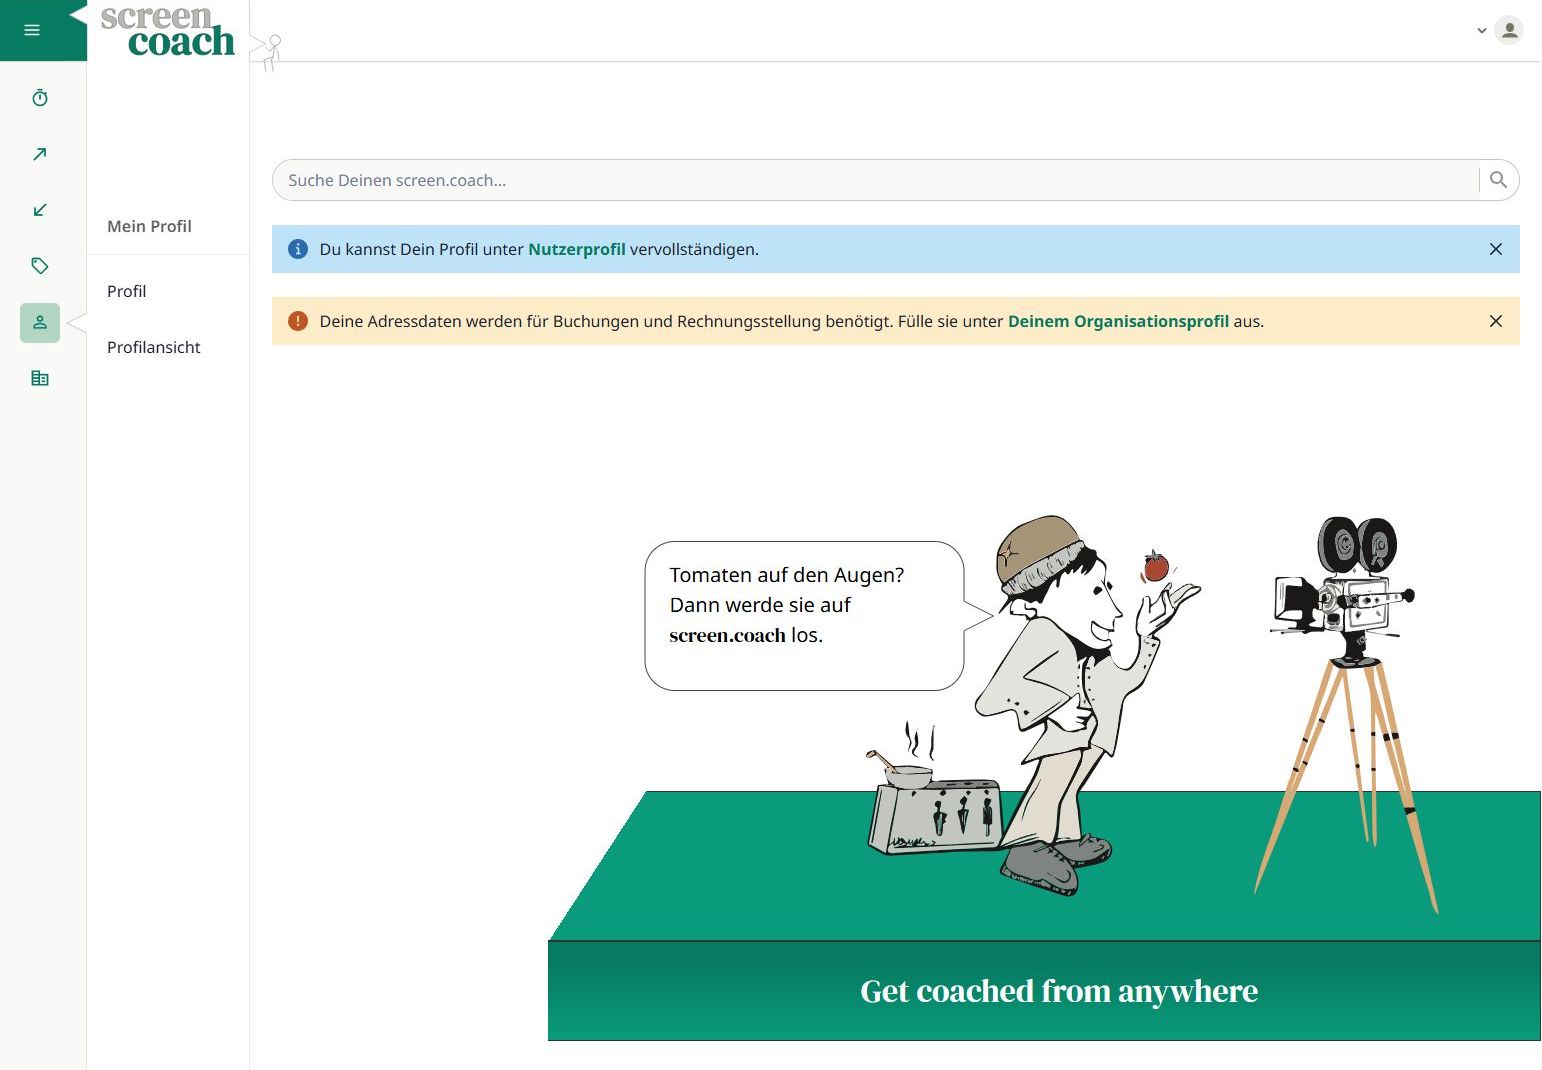
Direkt nach deiner ersten Anmeldung hast du hierzu schon Gelegenheit. Inmitten der Startseite findest du die Links zu Nutzerprofil und Organisationsprofil (siehe Bild). Ansonsten kannst du die Profile auch über die Navigation über (Nutzer) und (Organisation) aufrufen.
Nachfolgend gehen wir auf folgende Punkte ein:
📸 Professionelles Foto hochladen
📝 Kurze Beschreibung deiner Expertise
🏢 Organisationsprofil vervollständigen
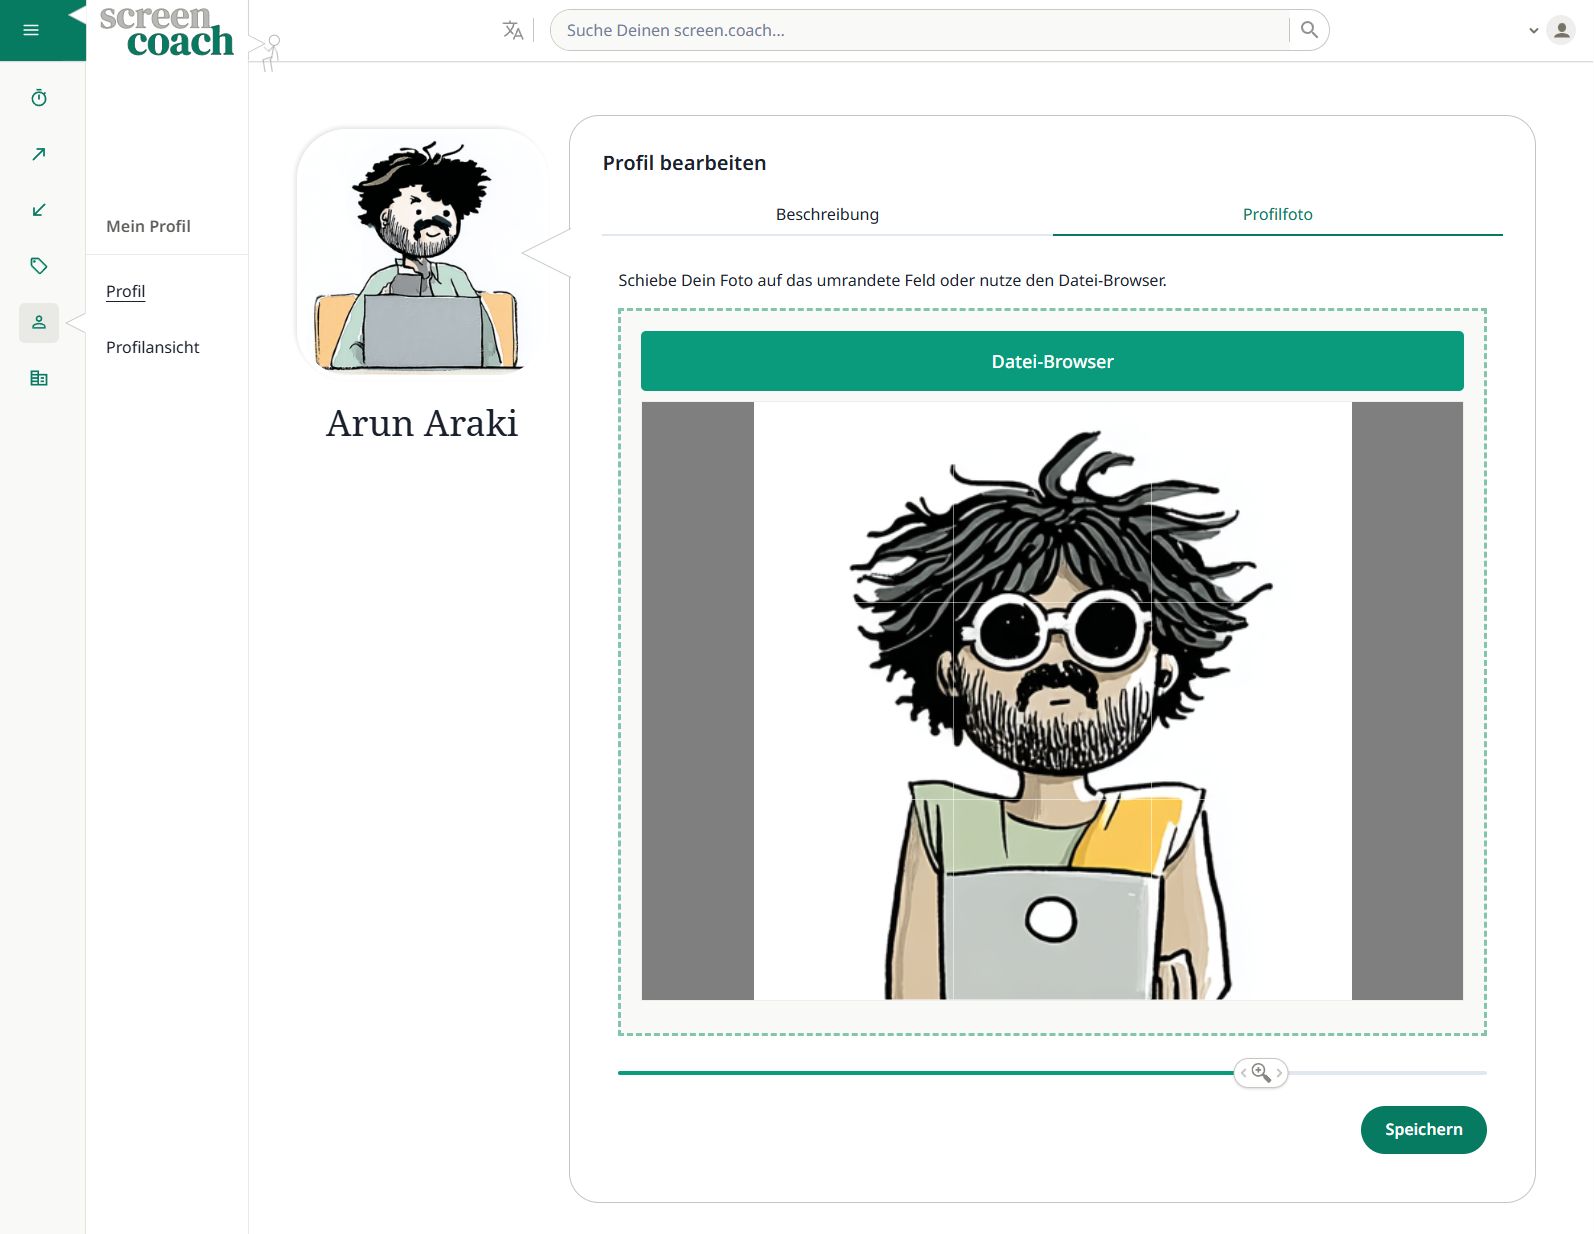
Unter Mein Profil kannst du dein Nutzerprofil anpassen:
- Im Reiter Beschreibung kannst du deine Expertise und Erfahrungen detailliert ausführen.
- Der Reiter Profilfoto ermöglicht es dir, ein professionelles Foto via Drag&Drop oder Dateibrowser hochzuladen.
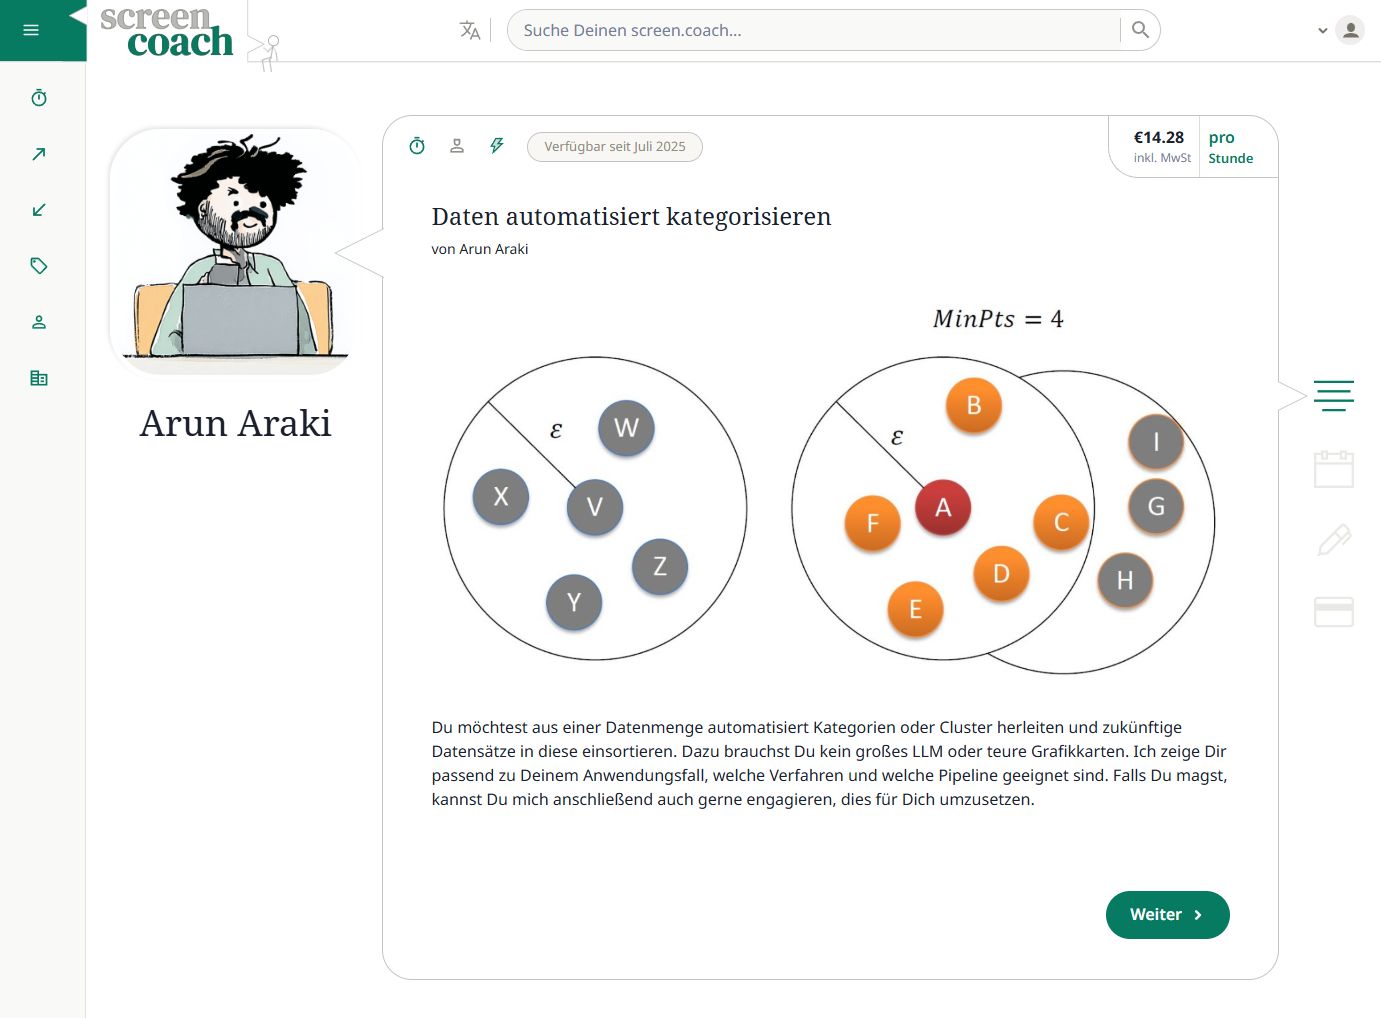
Das Profilfoto wird in der Übersicht deiner Angebote, in Suchergebnissen und bei Terminen angezeigt und sollte daher ansprechend sein. Meistens wird es mit deinem Namen neben einer Sprechblase angezeigt.
Nach einem Klick auf Speichern kann es bis zu 5 Minuten dauern, bis das Foto in der Übersicht erscheint. Falls Dein Browser es nicht anzeigt, lösche den Cache oder melde dich rechts oben ab und erneut an.
Nutzerprofil bearbeiten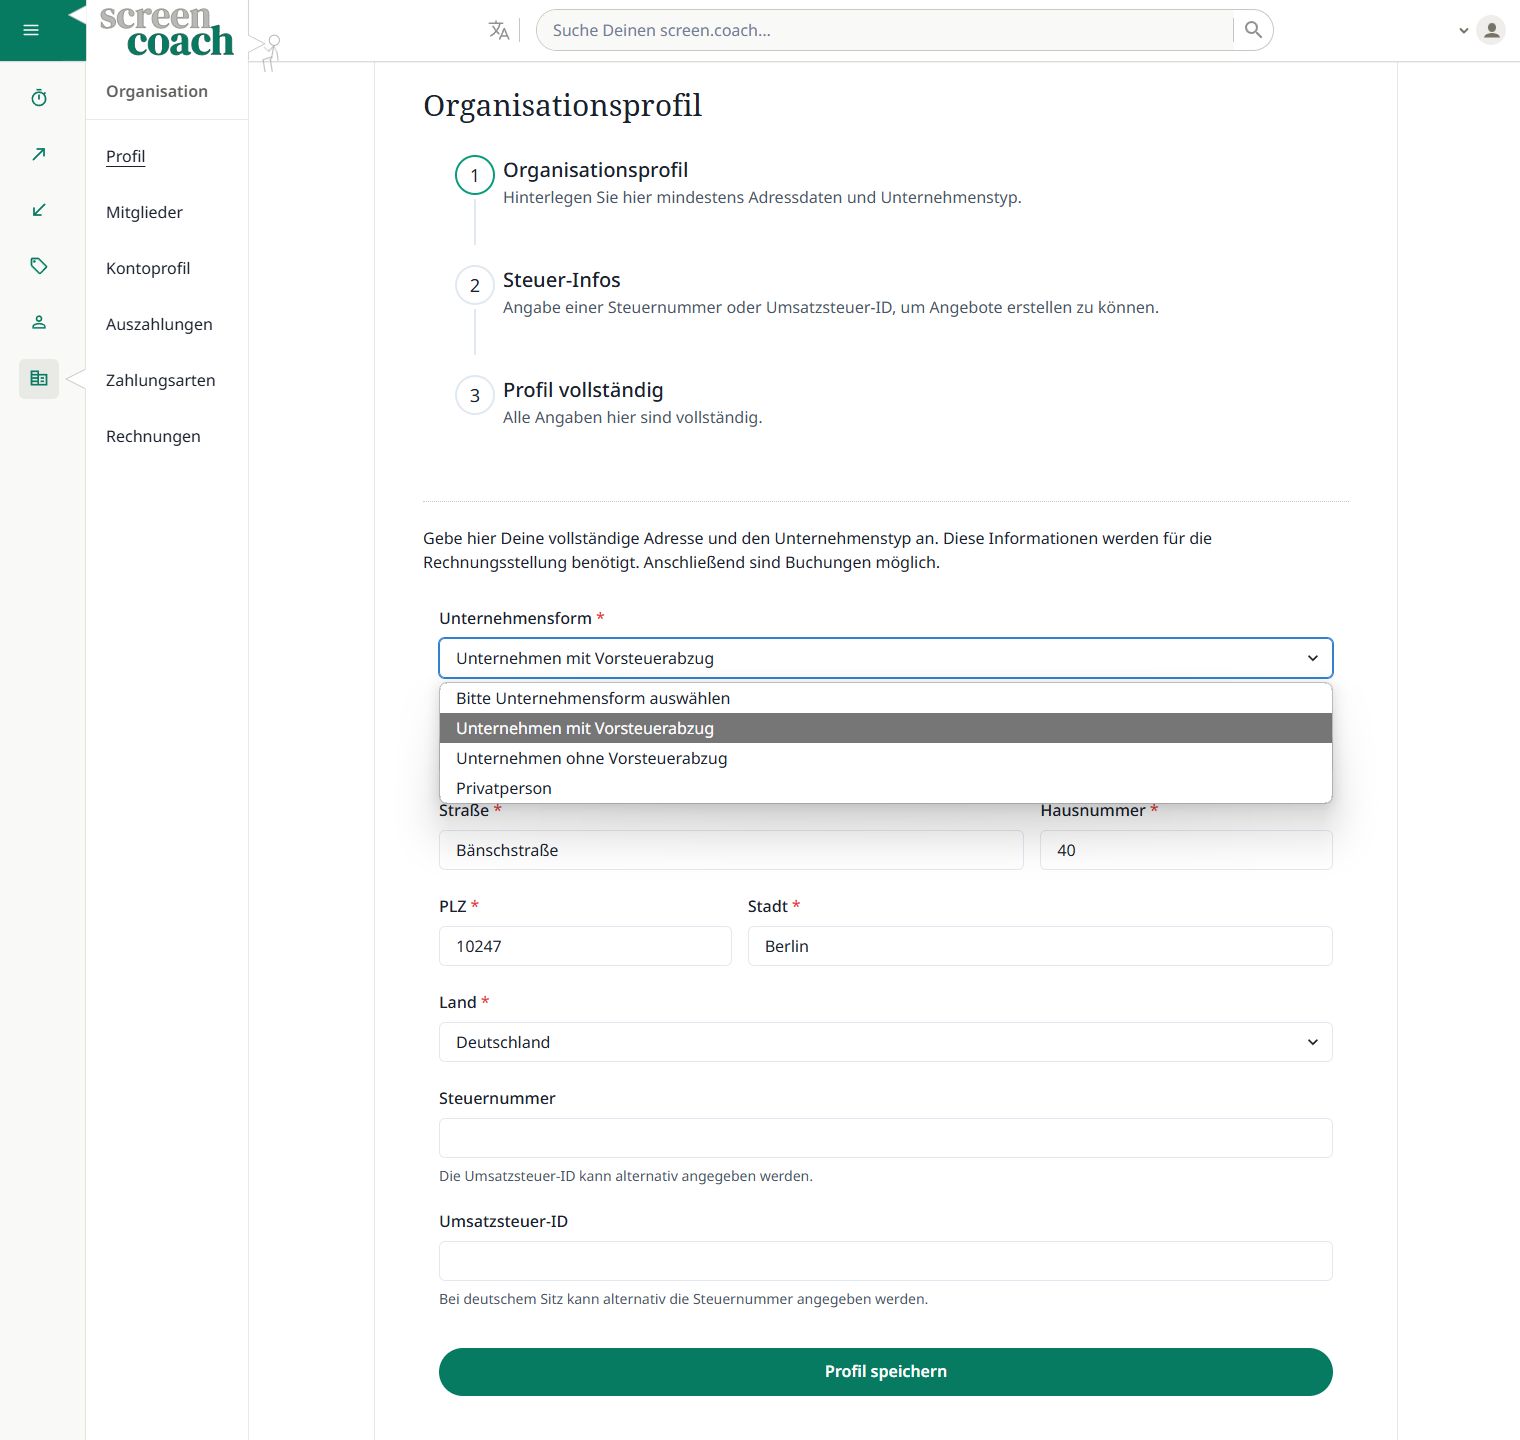
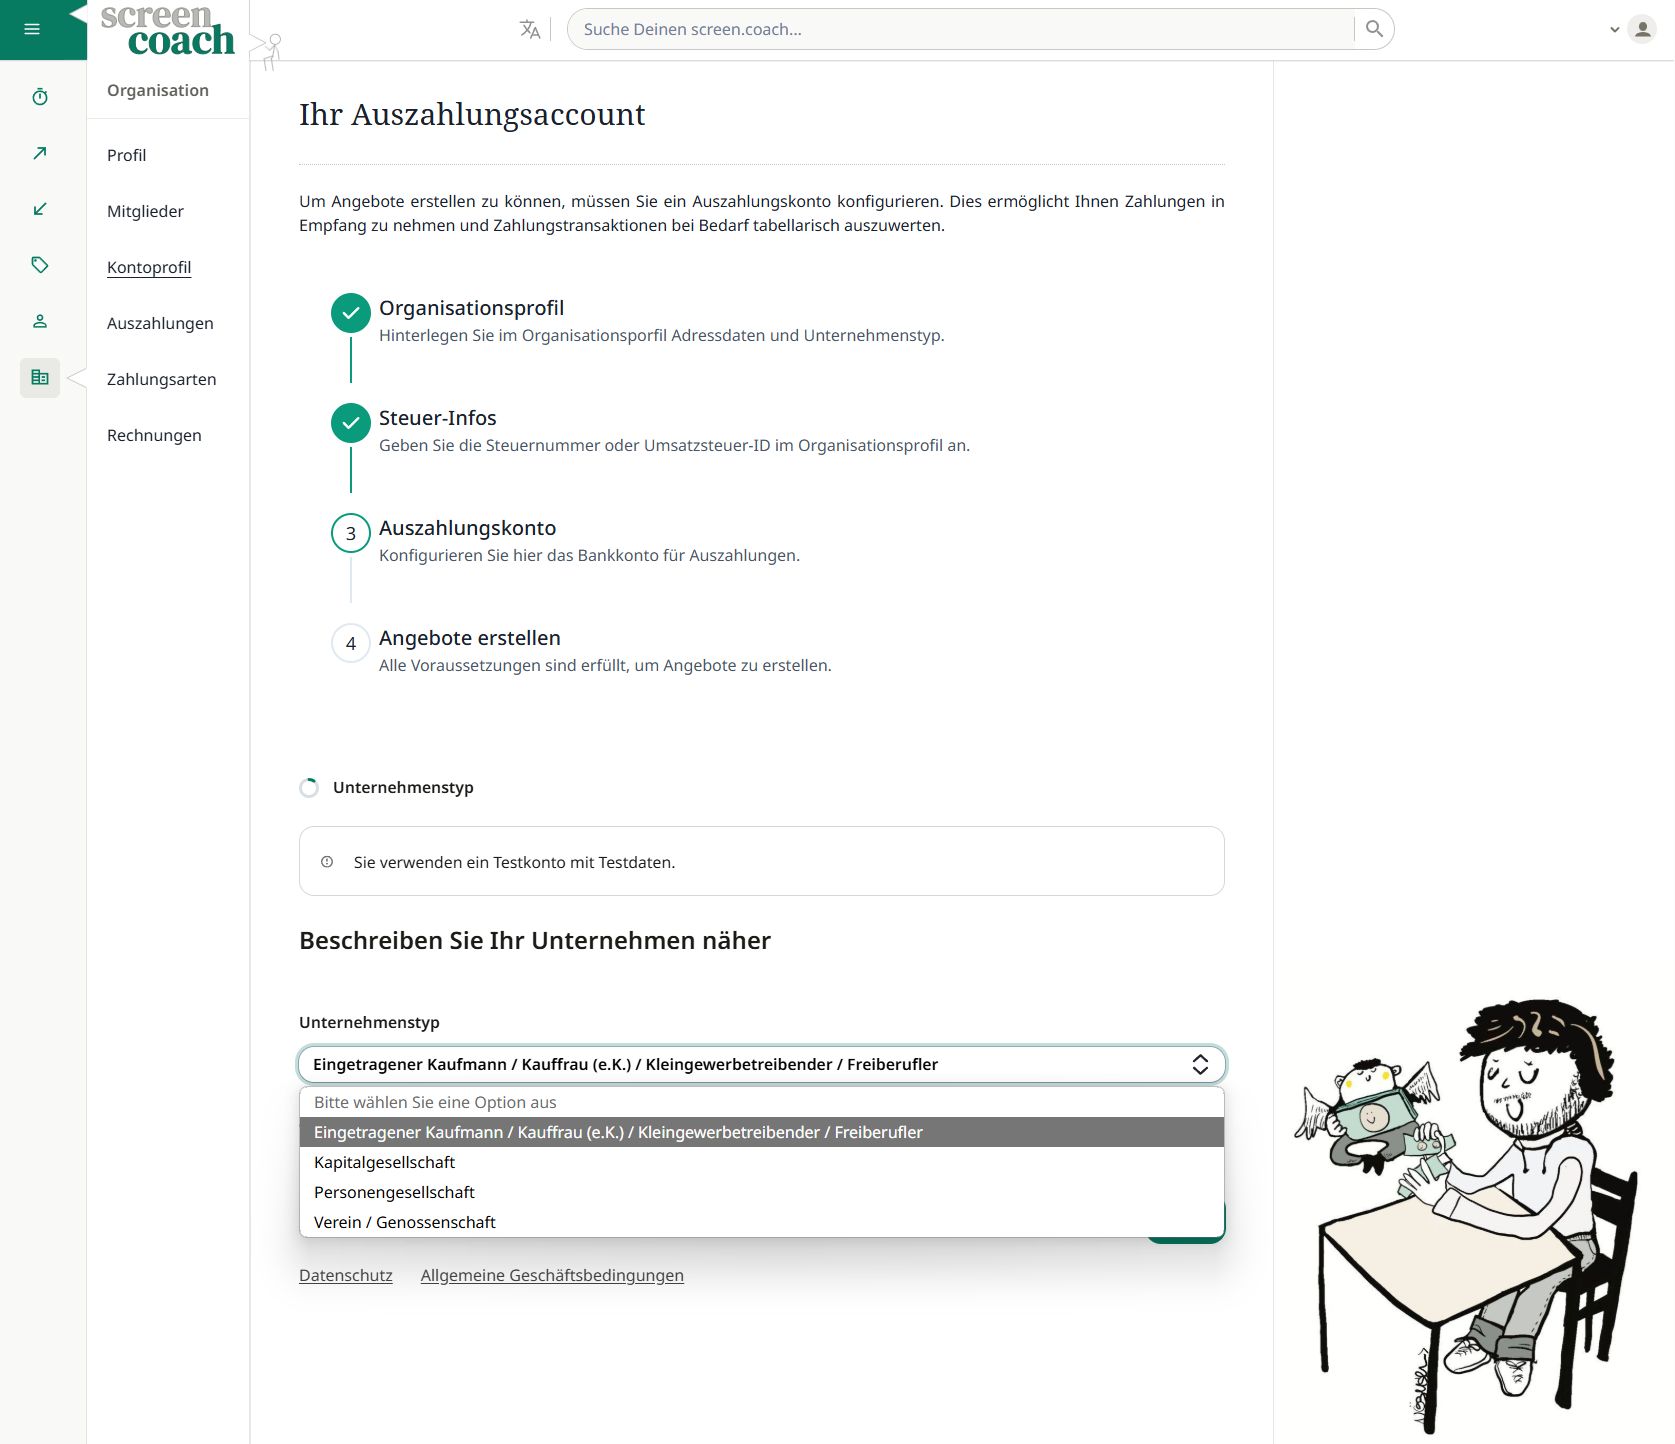
Im Organisationsprofil unter Profil kannst du zum einen deine Adresse und zum anderen Angaben zu deinem Unternehmen hinterlegen. Hierzu musst du zunächst den Unternehmenstyp auswählen:
- Privatperson: Du kannst eine Rechnungsadresse hinterlegen und Beratungsangebote buchen, jedoch selber keine erstellen.
- Unternehmen mit Vorsteuerabzug: Du bist Selbständiger oder Freiberufler oder führst beispielsweise eine UG oder GmbH und kannst Rechnungen mit ausgewiesener Mehrwertsteuer ausstellen. Dann kannst du Beratungsangebote erstellen und deine IBAN für Auszahlungen hinterlegen. Die Gutschriften werden dann mit Mehrwertsteuer ausgestellt.
- Unternehmen ohne Vorsteuerabzug: Du bist Kleinstunternehmer und führst ein Unternehmen, das keine Vorsteuerabzüge geltend machen kann. Dann kannst du Beratungsangebote erstellen und eine IBAN für Auszahlungen hinterlegen. Die Gutschriften werden dann ohne Mehrwertsteuer ausgestellt.
Schritt 3: Auszahlungskonto einrichten
Verbinde dein Bankkonto über unseren sicheren Partner Stripe. Stripe Payments Europe ist zertifiziert nach PCI Level 1, der höchsten Sicherheitsstufe für Zahlungsdienstleister, und verfügt über eine europäische E-Geld-Lizenz.
Gelder kommen abzüglich der screen.coach-Gebühr auf ein virtuelles Stripe-Express-Konto, welches dir exklusiv zugewiesen ist. Am Monatsende werden von deinem virtuellen Konto die Zahlungen für bereits stattgefundene Termine an dein Bankkonto überwiesen.
Nachfolgend gehen wir näher auf das Stripe-Onboarding ein, insbesondere auf:
🏢 Angaben zur Person und zum Unternehmen
🏦 IBAN hinterlegen
🛡️ Sichere Stripe-Verifizierung
💰 Monatliche Auszahlungen
📊 12% Plattformprovision (inkl. MwSt.)
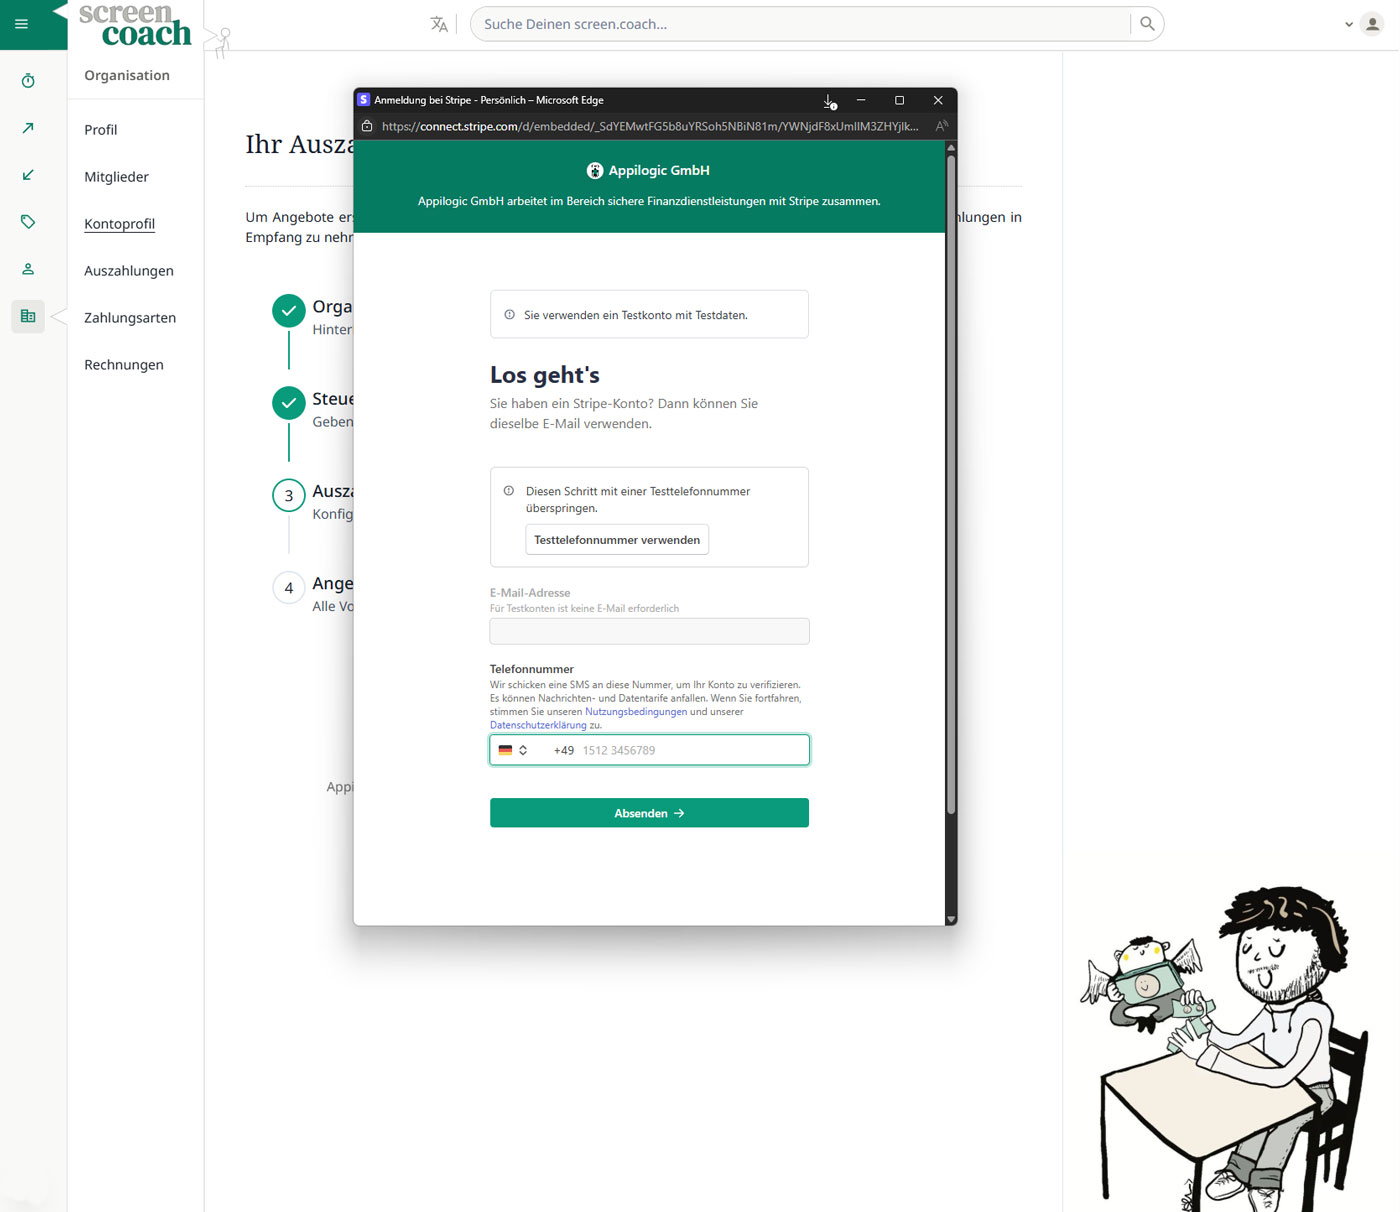
Über den Button oben oder unter Kontoprofil kannst du mit dem Stripe-Onboarding beginnen. Die Anmeldung erfordert eine gültige mobile Telefonnummer für die Zwei-Faktor-Authentifizierung. Du erhälst einen Zahlencode per SMS, den du eingeben musst, um fortzufahren.
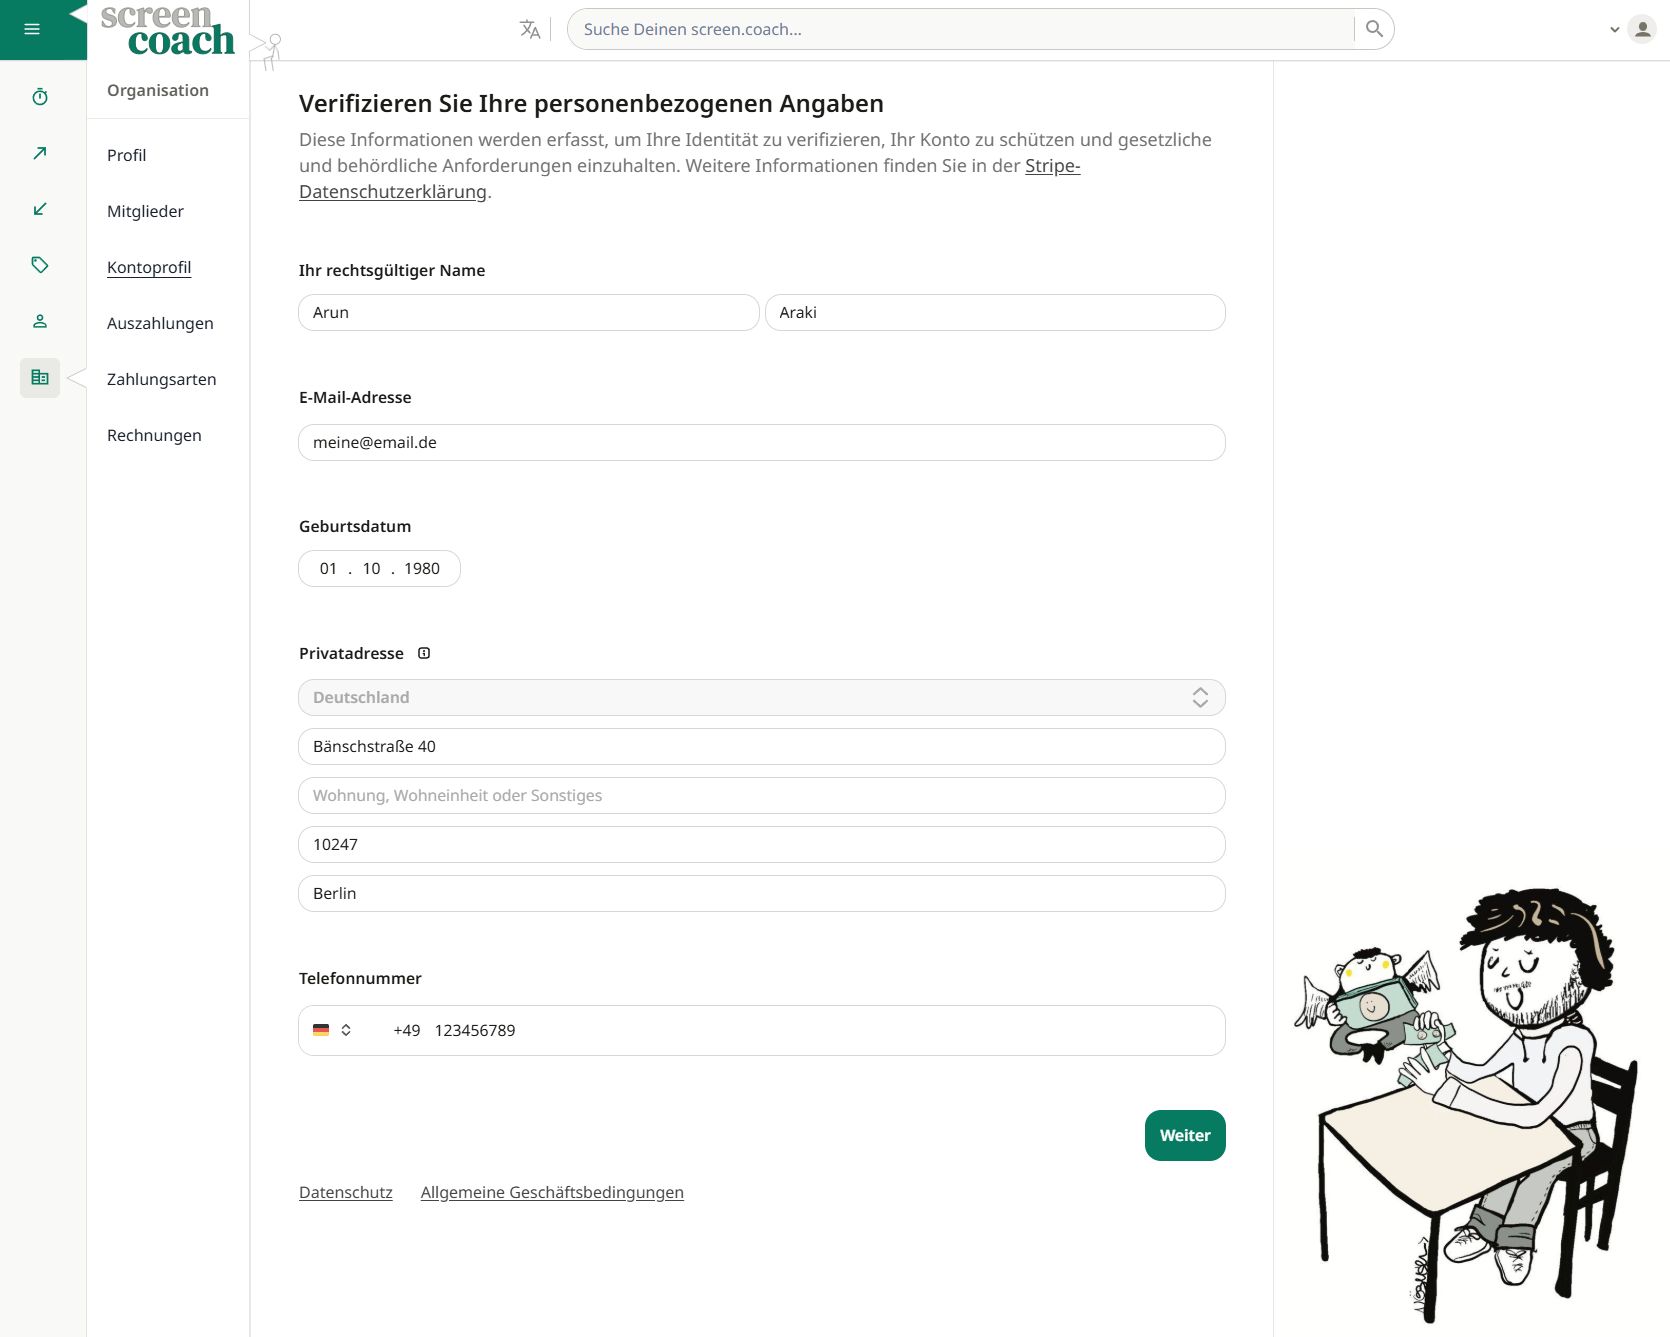
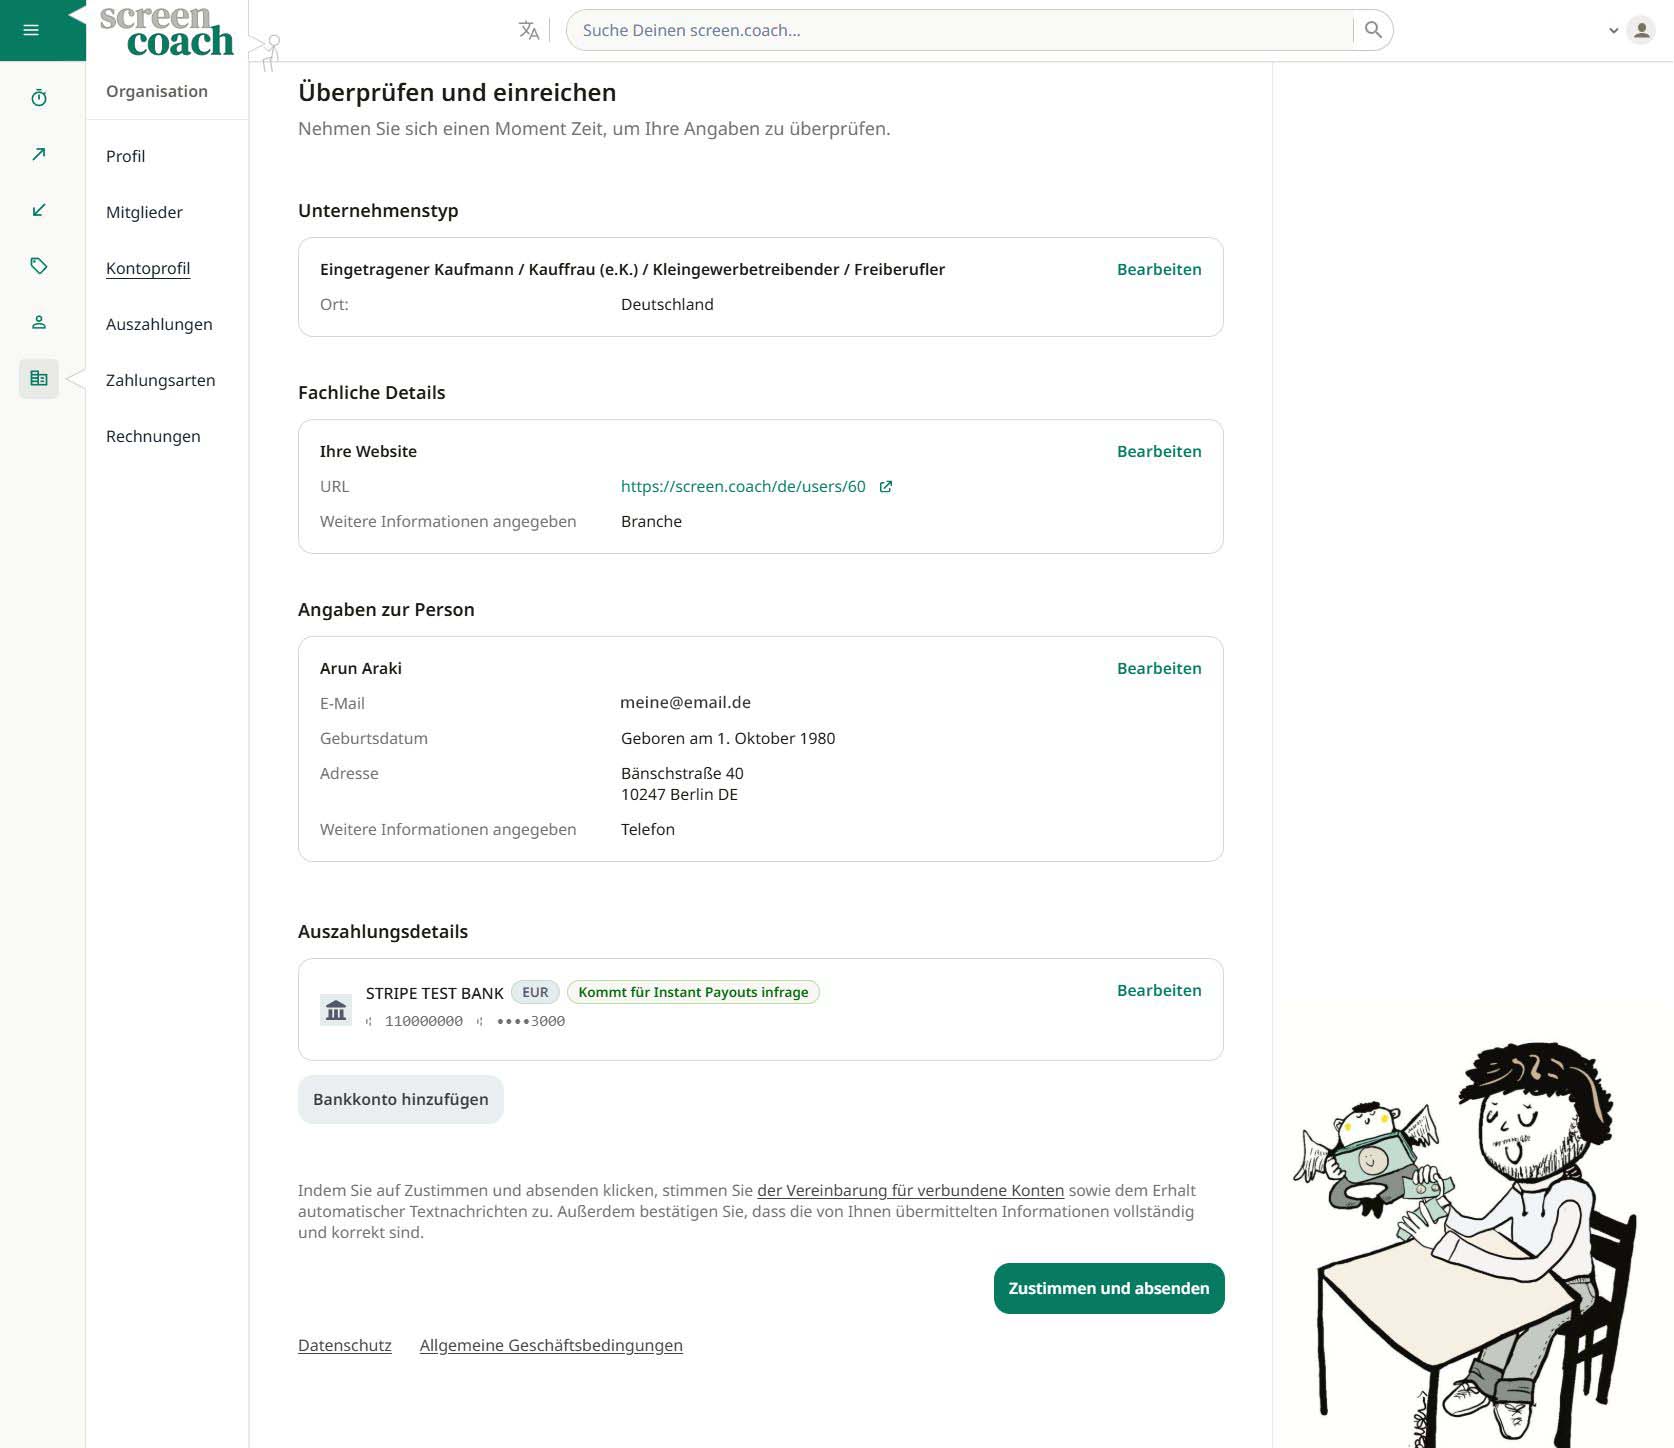
Anschließend wirst du durch den Stripe-Onboarding-Prozess geleitet, der unter anderem folgende Angaben umfasst:
- Rechtsform deines Unternehmens, eventuell Steuernummer und Handelsregistereintrag
- Persönliche Angaben (Name, Adresse, Geburtsdatum), eventuell Geschäftsführerangaben
- Deine Bankverbindung (IBAN)
Die angegebenen Daten werden bei Stripe hinterlegt, nicht bei screen.coach. Das angezeigte Formular ist ein sogenannntes IFrame von Stripe, auf welches screen.coach keinen Zugriff hat. Dies ist ähnlich zu den Formularen bei Kreditkartenzahlungen. Bei erfolgreichem Abschluss des Stripe-Onboardings teilt uns Stripe Eckdaten wie Namen und E-Mail-Adresse und die Kennung deines virtuellen Stripe-Kontos automatisch mit, so dass es mit deinem screen.coach-Konto verknüpft werden kann.
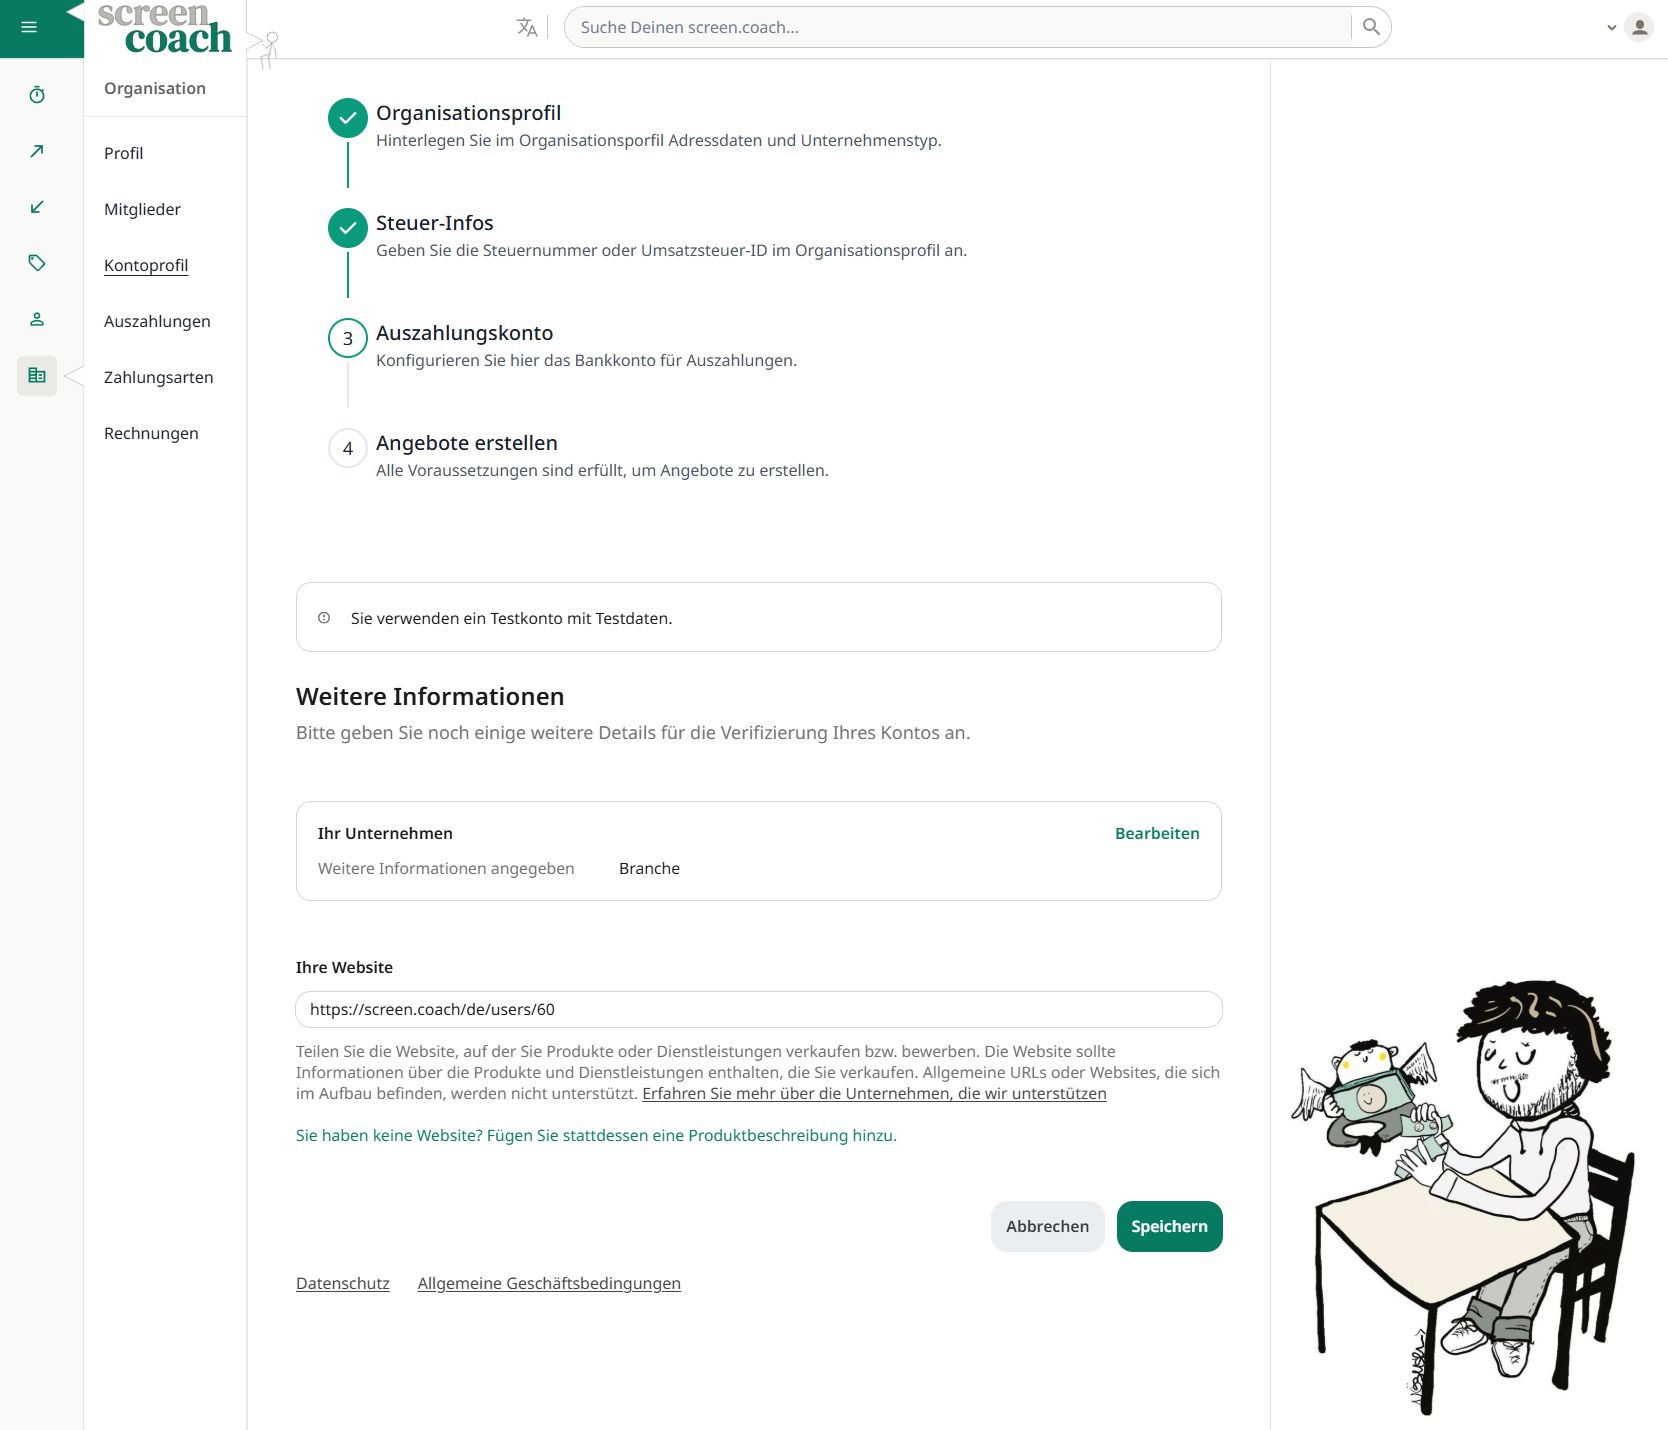
Übrigens: Als Unternehmen kann die Angabe einer Webseite erforderlich sein, auf welcher die eigenen Dienstleistungen dann beschrieben oder angeboten werden. Dies kann beispielsweise die eigene Webseite, ein Social-Media-Profil oder der Link zum screen.coach-Profil sein: Profilansicht
Wieso das Ganze? Stripe muss gemäß europäischer und nationaler Finanzvorschriften, etwa dem deutschen Geldwäschegesetz (GwG), Know Your Customer (KYC)-Anforderungen erfüllen. Das heißt, dass bestimmte Angaben zu dir und deinem Unternehmen erhoben und verifiziert werden müssen. Das schützt nicht nur dich, sondern auch deine Kunden und die Integrität der Plattform.
In diesem Zusammenhang musst du auch deine Branche angeben. Zur Auswahl steht eine Liste mit den gängigsten Branchen. Für Berater und Coaches ist die Kategorie Beratungsdienstleistungen meistens passend.
Im Rahmen des Know Your Customer (KYC)-Prozesses ist Stripe verpflichtet, deine Identität zu überprüfen und je nach Unternehmenstyp zusätzliche Informationen zu sammeln. Letzteres betrifft vor allem juristische Personen des Privatrechts, wie etwa GmbHs und Aktiengesellschaften.
Für die Identitätsprüfung solltest du ein gültiges Ausweisdokument bereithalten, welches im besten Fall mit den personenbezogenen Angaben übereinstimmt. Hierzu erhältst du gegen Ende des Onboarding-Prozesses eine SMS von Stripe, die einen Link enthält. Über diesen Link kannst du die Identitätsprüfung durchführen. Dabei wird für gewöhnlich ein Selfie und ein Foto vom Ausweisdokument geschossen. Der Prozess dauert nur wenige Sekunden. Die Verifizierung ist automatisiert.
Nach Einreichung der erforderlichen Informationen erfolgt die Aktivierung des Stripe-Kontos für gewöhnlich innerhalb weniger Minuten. In einigen Fällen kann es jedoch bis zu 24 Stunden, in seltenen Fällen sogar bis zu 5 Tagen dauern, bis das Konto vollständig aktiviert ist. Sobald dein Stripe-Konto aktiviert ist, kannst du Beratungsangebote unter Neues Angebot erstellen.
Deine Angaben kannst du jederzeit unter Kontoprofil einsehen und aktualisieren. Bitte beachte, dass bestimmte Änderungen die Identitätsprüfung erneut erforderlich machen können.
Unter Auszahlungen finden sich alle Transaktionen auf dein virtuelles Stripe-Konto und anstehende Überweisungen an dein Bankkonto. Die Transaktionsdaten lassen sich alle in verschiedenen Formaten und Detailgraden exportieren, etwa für die eigene Buchhaltung.
Die Plattformprovision beträgt 12% (inkl. MwSt.) und wird automatisch von den Einnahmen abgezogen, bevor die Transaktion an dein virtuelles Stripe-Konto erfolgt. Diese Gebühr deckt unsere Kosten für die Zahlungsabwicklung, die Video-Übertragung, die Bereitstellung und Weiterentwicklung der Plattform und den Support.
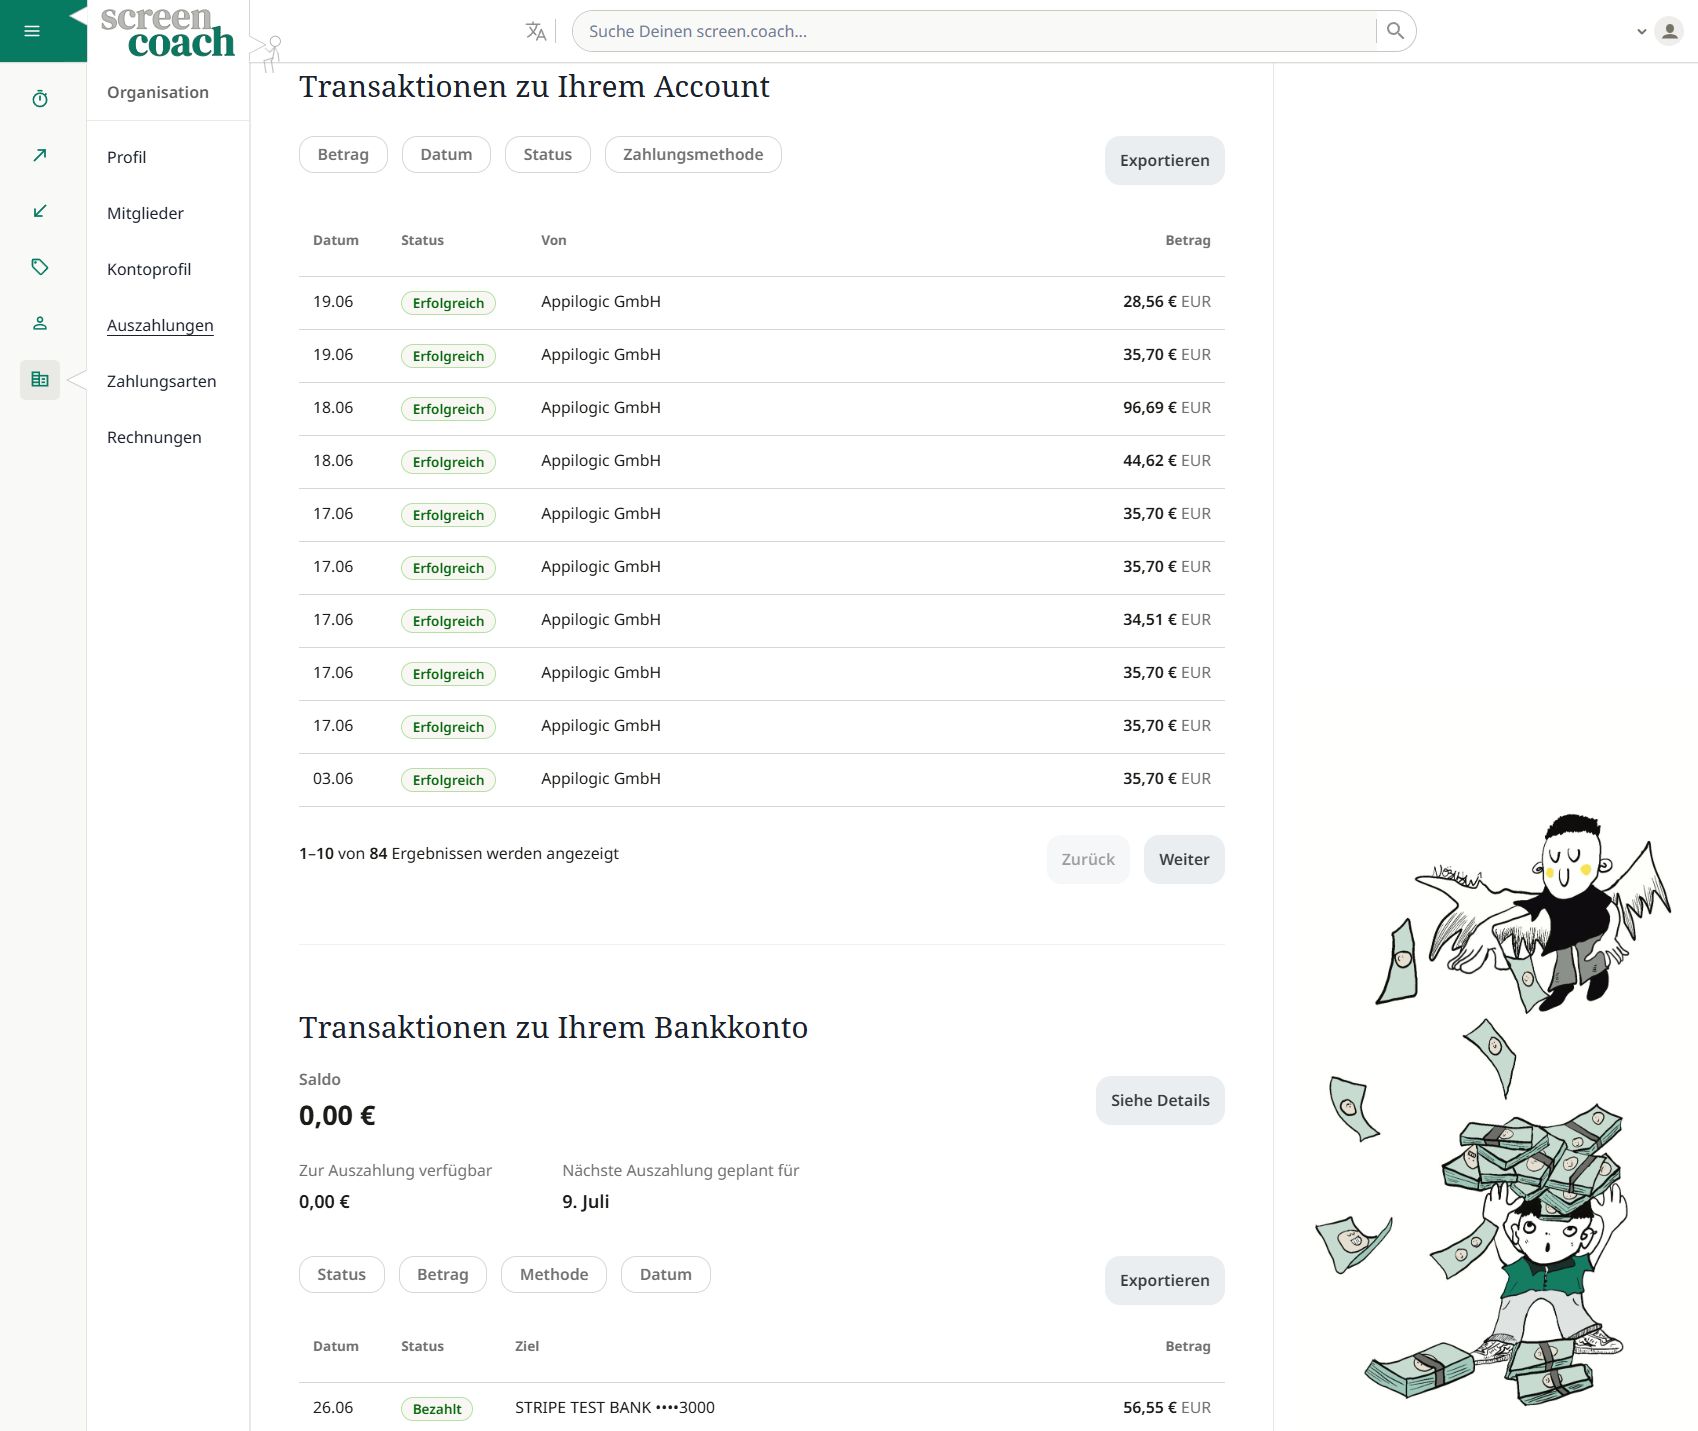
Deine Einnahmen werden in deinem virtuellen Stripe-Konto gesammelt. Am Monatsende erfolgt eine Überweisung an dein Bankkonto. Die Überweisung umfasst alle bereits stattgefundenen Termine des ablaufenden Monats.
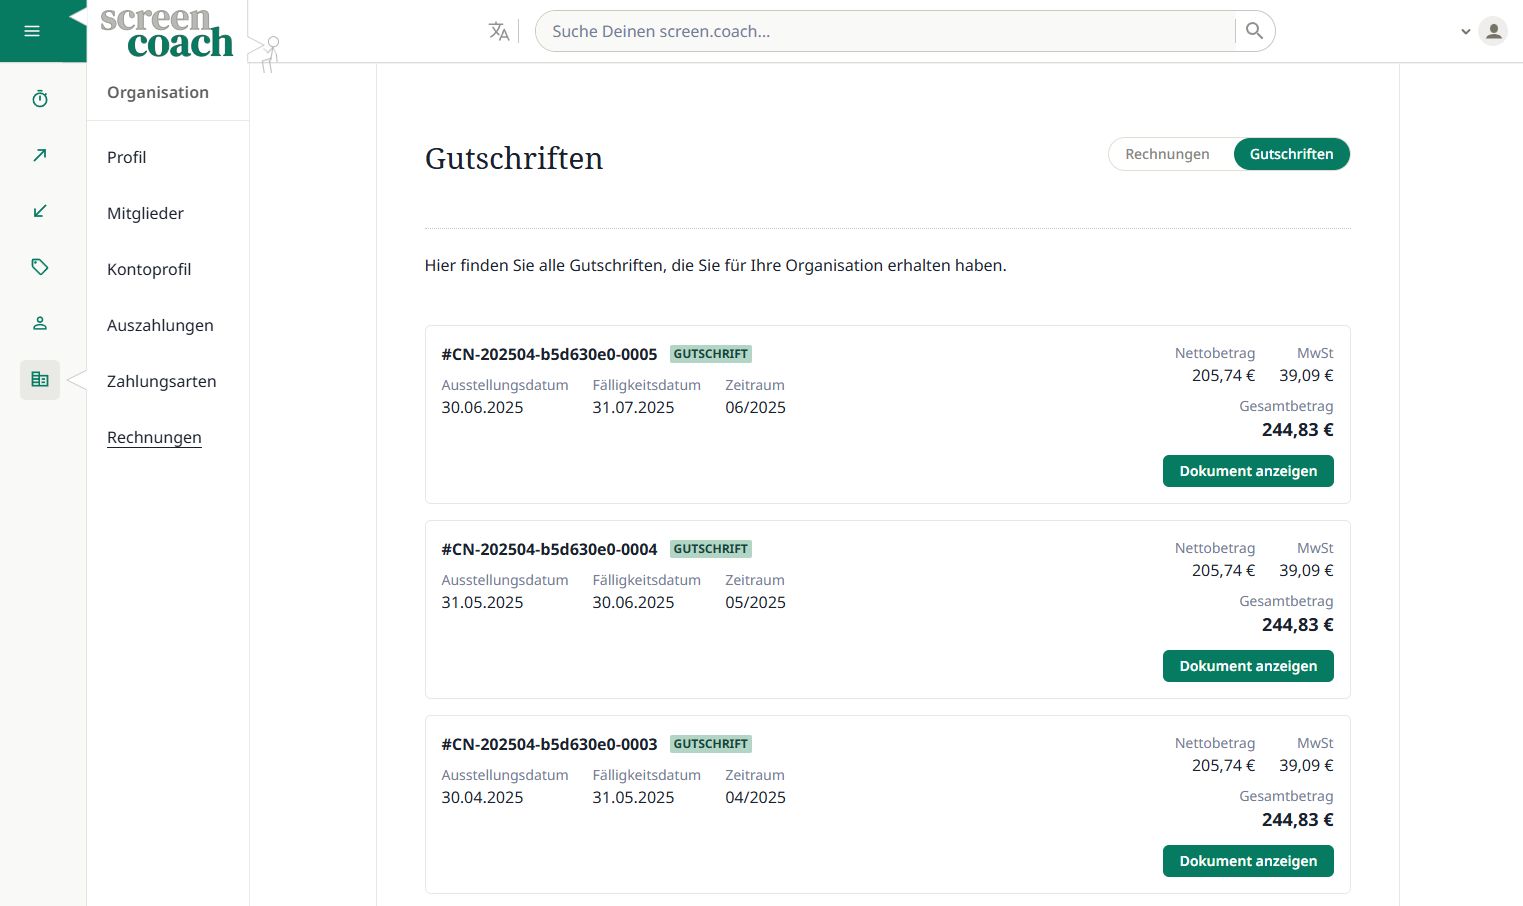
Unter Rechnungen findest du alle Sammelrechnungen und Sammelgutschriften. Die Sammelgutschrift enthält alle Termine des abgelaufenen Monats, die bereits stattgefunden haben. Die PDF ist für deine Buchhaltung gedacht und enthält alle relevanten Informationen. Sie ist als E-Rechnung bzw. E-Gutschrift im Zugferd-Format formuliert und kann von den meisten Buchhaltungssoftwares und -plattformen direkt verarbeitet werden.
Schritt 4: Angebote kreieren
Erstelle deine ersten Beratungsangebote. Definiere deine Verfügbarkeiten und setze deinen Stundensatz. Der Kalender-Builder macht es kinderleicht.
Die Angebotserstellung umfasst folgende Schritte, auf die wir nachfolgend eingehen:
📅 Verfügbarkeiten im Kalender markieren
💶 Stundensatz und Angebotstyp festlegen
📝 Angebotsbeschreibung verfassen
🖼️ Ansprechendes Bild hinzufügen
Unter Neues Angebot kannst du dein erstes Beratungsangebot erstellen. Als allererstes markierst du deine Verfügbarkeiten im Kalender. Hierzu gehst du auf die Tage, an denen du verfügbar bist, und ziehst den Mauszeiger über die Uhrzeiten an denen du verfügbar bist. Rechts oben im Kalender kannst du wochenweise nach hinten/vorne springen oder auf den heutigen Tag zurückkehren oder die Ansicht ändern.
Mit einem Klick auf ein eingezeichnetes Zeitfenster öffnet sich ein kleines Menü. Darin kannst Du die Verfügbarkeit auch über mehrere Tage oder wiederkehrend einstellen. Ein verfügbarer Zeitraum am Freitag wird beispielsweise im Video wiederkehrend für Montag und Mittwoch eingestellt. Die Wiederholungen sollen Anfang Oktober enden. Einzelne Zeitfenster aus diesen Wiederholungen kannst du auch löschen. Dies funktioniert auch nachträglich nach Einstellung deines Beratungsangebots.
Übrigens ist ein Überbuchungsschutz eingebaut: Bei mehreren Angeboten wirst du automatisch bei den jeweils anderen Angeboten für einen Zeitraum als nicht verfügbar angezeigt, solltest du zu diesem bereits gebucht sein. Das heißt, du kannst mehrere Angebote gleichzeitig erstellen, ohne dass du dir Sorgen vor Überbuchungen machen musst.
Mit einem Klick auf Weiter gelangst du zum nächsten Schritt, in welchem du den Stundensatz und den Angebotstyp festlegst.
Bei screen.coach gibt es drei verschiedene Angebotstypen, die du auswählen kannst:
- Flexibel: Kunden können innerhalb deiner verfügbaren Zeiträume die Dauer des Termins frei wählen. Die Zeitschritte kannst du einstellen, beispielsweise in 30-Minuten-Schritten, so dass 30, 60, 90,...Minuten buchbar sind. Flexible Angebote sind ideal für 1:1-Beratungen und komplexe Themen, die je nach Kundenbedarf variieren können.
- Zeitslots: Du legst fest, wie groß die Zeitfenster sind, die Kunden buchen können. Deine verfügbaren Zeiträume werden entsprechend in diese Zeitslots unterteilt. Kunden können dann einen Zeitslot buchen. Dies ist besonders nützlich für Kurz-Beratungen oder -Workshops. Die Teilnehmerzahl kann ebenfalls festgelegt werden, so dass du beispielsweise einen Workshop mit 10 Teilnehmern anbieten kannst.
- Events: Du kannst ein Event erstellen, bei dem Kunden sich für einen ganzen, also zusammenhängenden, Zeitraum anmelden können. Dies ist ideal für Webinare, Vorträge oder andere Veranstaltungen, bei denen eine größere Teilnehmerzahl und ein größerer Zeitraum erforderlich sind. Ein einzelner zusammenhängender Zeitraum kann auch über mehrere Tage gehen, etwa ein 2-tägiges Seminar.
Ein Klick auf Weiter bringt dich zur Vorschau deines Kalenders, so wie er für Kunden sichtbar ist.

Allen drei Angebotstypen gemein ist, dass du den Mindestzeitraum zwischen Buchung und Termin festlegen kannst, so dass Kunden zum Beispiel nicht kurzfristig buchen können, wenn du nicht möchtest.
Auch kannst du bei allen drei Angebotstypen bestimmen, ob eine Anfrage vor der Buchung erforderlich ist. Das ist besonders nützlich, wenn du vorab Informationen benötigst, um zu entscheiden, ob du Termine annimmst oder ablehnst. In diesem Fall erhältst du eine E-Mail-Benachrichtigung, sobald ein Kunde einen Termin aussucht und eine Anfrage stellt. Du kannst dann entscheiden, ob du den Termin annimmst oder ablehnst. Bei Annahme wird der Termin automatisch in deinen Kalender eingetragen und der Kunde erhält eine E-Mail-Benachrichtigung, um innerhalb der kommenden 24 Stunden zu bezahlen. Erfolgt keine Zahlung, wird der Termin automatisch storniert.
Bei der Direktbuchung hingegen kann der Kunde direkt buchen und bezahlen, ohne dass du den Termin vorher bestätigen musst. Dies ist besonders nützlich, wenn du viele Anfragen erhältst (etwa bei Webinaren) und die Terminbestätigung automatisieren möchtest. Kunden können dennoch einen Text zu ihrer Buchung mitsenden. Angebote mit Direktbuchung werden in Suchergebnissen besonders markiert.
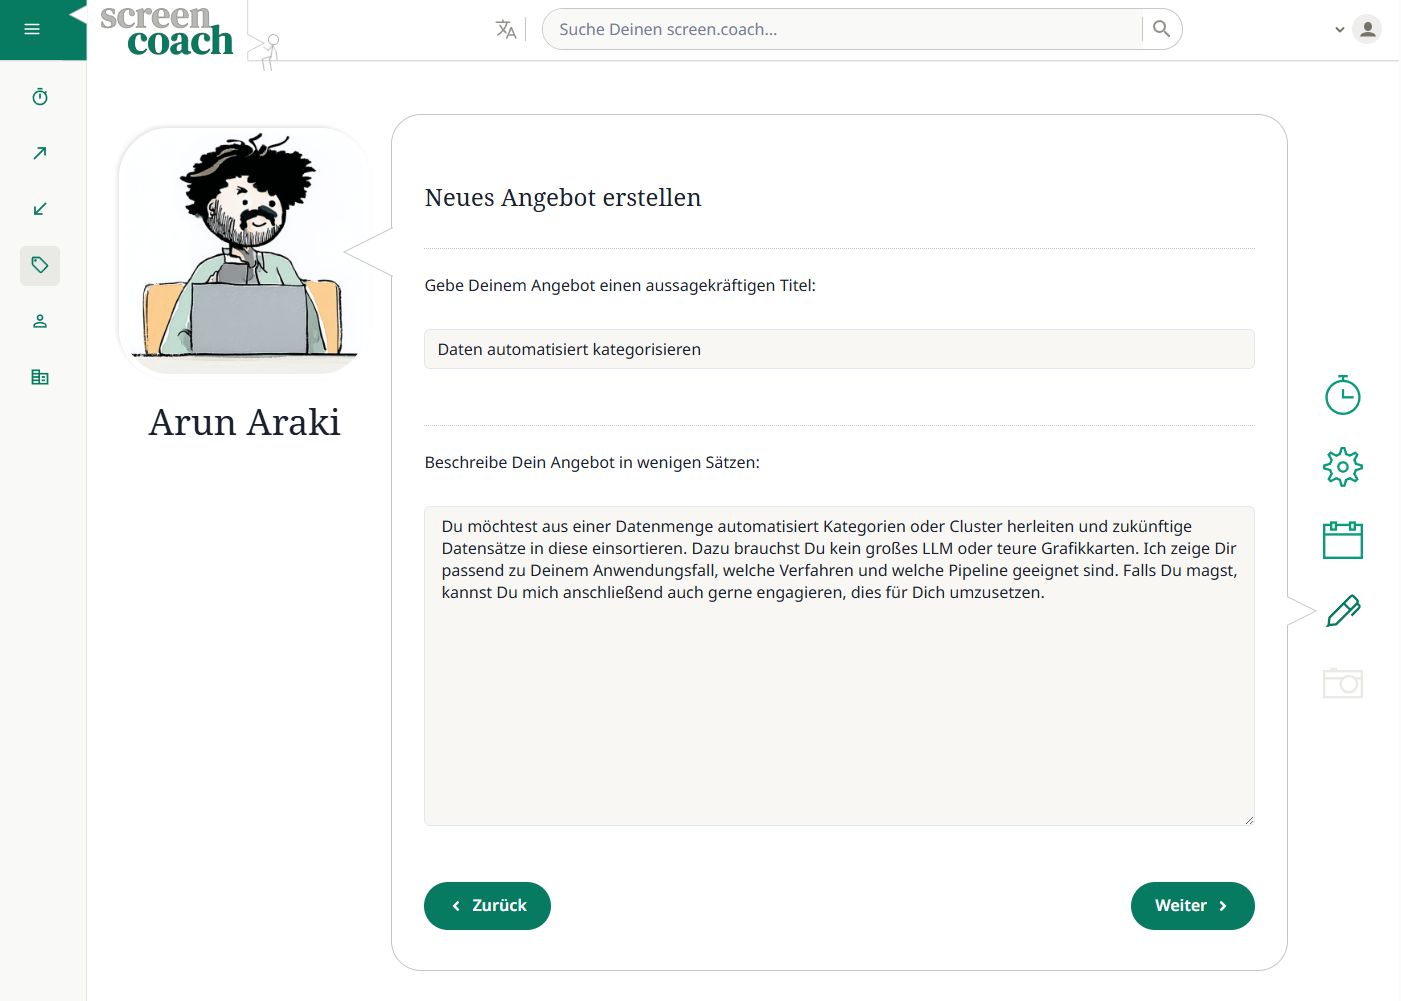
Sind alle Eigenschaften deines Angebots eingestellt, musst du noch einen Titel angeben und eine Beschreibung verfassen, die dein Angebot erklärt und potenzielle Kunden überzeugt. Hier kannst du deine Expertise und den Nutzen deines Angebots hervorheben. Achte darauf, dass die Beschreibung klar und ansprechend ist. Beachte auch, dass unsere Suchmaschine die Beschreibung für die Auffindbarkeit deines Angebots nutzt.
Im letzten Schritt kannst du ein Angebotsbild hochladen, das dein Angebot visuell unterstützt. Das Bild sollte passend zum Beratungsangebot und professionell sein. Es wird unter anderem auch auf deinem Profil angezeigt.
Mit einem Klick auf Absenden wird dein Angebot erstellt und ist sofort für Kunden sichtbar. Du kannst jederzeit dein Angebot bearbeiten, wie zum Beispiel Zeiten hinzufügen oder löschen oder Bild und Text bearbeiten. Änderungen werden mit einer Verzögerung von circa 5 Minuten wirksam.
Nun kannst du dein Angebot oder deine Profilseite bewerben, um Kunden zu gewinnen. Sobald ein Kunde dein Angebot bucht, erhältst du eine E-Mail-Benachrichtigung.
Im Video siehst du, wie eine Kundin ein Angebot sucht, einen Termin auswählt, eine kurze Info formuliert und die Zahlung vornimmt. Sobald die Zahlung erfolgt ist, erhälst du eine E-Mail und der Termin wird automatisch in deiner Terminübersicht eingetragen. In der Terminübersicht liegt sowohl für dich als auch für die Kundin ein Buchungsnachweis.
Wichtig: Die Teilnahme am Termin erfolgt auch über die Terminübersicht über den Button Sitzung beitreten. Der Button funktioniert erst 10 Minuten vor Terminbeginn. Sollte die Verbindung abbrechen, kannst du den Termin über den Button erneut aufrufen und der Sitzung wieder beitreten.
Vergangene Termine können in der Terminübersicht über den Reiter oben rechts aufgerufen werden.
Im Beispielvideo ist das Angebot direkt buchbar, so dass die Kundin direkt buchen und bezahlen kann. Bei Angeboten mit Anfrage muss der Termin erst von dir bestätigt werden.
Schritt 5: Termine wahrnehmen
Jetzt kann es losgehen! Sobald Kunden deine Angebote buchen, führst du die Video-Sessions direkt im Browser durch. Einfacher geht's nicht.
📧 Automatische Buchungsbenachrichtigung
💻 Video-Session im Browser starten
🎯 Kundenprobleme lösen
💰 Geld verdienen
Bereit durchzustarten?
Dein Coach-Profil steht in unter 15 Minuten. Starte noch heute!
Noch Fragen?
Copyright © 2025 Appilogic GmbH. Alle Rechte vorbehalten.
Copyright © 2025 Appilogic GmbH. Alle Rechte vorbehalten.